

Check out our guide for how to use a double edged razor, from our friends at Worthy and Spruce. This is the ultimate guide for using this shaving technique.
Stage 1 – Readying Your Face.
As with many things in life, the path to achieving great results is 80% preparation and 20% execution. Your morning shave should be no different.
With this in mind, the first and most important preparatory step with all shaving, Double Edge included, is to use plenty of hot water on the face to soften the bristles and open the pores. Ideally have a hot bath or shower first for best results.
The main thing to be aware of with a Double Edge Razor is that it must be used regularly (i.e. daily) as it will pull and catch on more than a day’s worth of growth. If you do happen to be working with more than a day’s worth of stubble make sure to trim it down beforehand.
Stage 2 – Preparing Your Brush
Soak your brush in very hot water for a couple of minutes. This will soften the bristles and make for a more efficient lather. Ideally you should be using a fine pure badger hair brush. The bristles on a badger hair brush will help to agitate and lift the hairs on your face, allowing for a closer shave.
“Enjoy your daily ritual. Take your time with it.”
Shake some of the excess water from the brush and whilst still damp use your brush to lather up your shave soap. Use a smooth, circular motion to apply the lather to your face. You’ll be looking for a thick, creamy lather to form. Maintain a wet lather as any type of shave will be foiled otherwise.
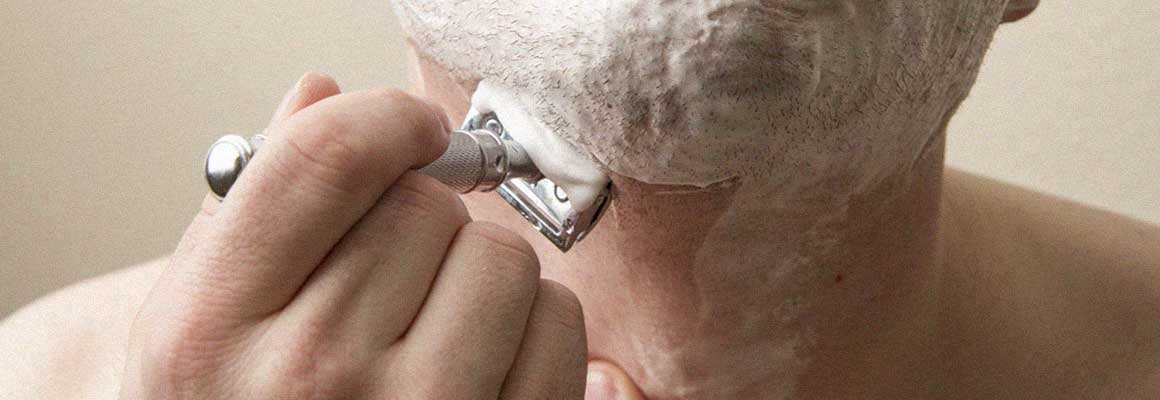
Stage 3 – The Shave
Grasp the razor in your leading hand firmly, but not tightly. Let the razor rest flat against your cheek and then angle it out to about 30 degrees. Pull straight down with very little pressure, the weight of the razor’s handle should ideally be doing the work for you.
Try to use short, even strokes as you go and be sure to stretch the skin and draw in the same direction as the grain of the hair (in most instances this should be downwards). You should go over each area twice in the same direction, manoeuvring the blade slowly but confidently around your face.
Stage 4 – Finishing Up
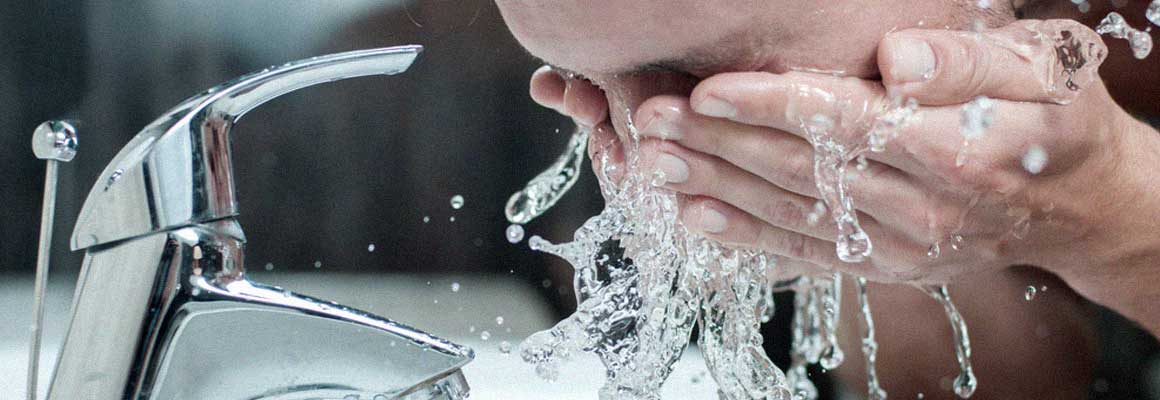
Whenever you have finished with your main shave, wash off the excess foam with warm water. Now re-lather your face and shave again. This time you want to shave against the grain of the hair (in most cases this will be upwards).
This will ensure a tight, close shave. When completed, rinse your face in warm water and then finally cold water to freshen up and to close the pores.
Dab your face dry with a clean towel and when totally dry apply an after shave lotion to minimise the risk of irritation and to help stop the skin from drying out. Rinse off your razor and dab it dry with a cloth, applying a little oil to ensure it doesn’t rust.
Stage 5 – Pep Talk
This guide will help you to perfect using your razor and maximise your chances of an ideal shave but the only way to truly master the art is through practice, patience and perseverance.
Enjoy the daily ritual and take your time with it. Accept that occasional nicks, razor burn, and ingrowing hairs are inevitable but know that in no time at all you’ll have it down pat. Your face will tell you it’s worth the effort.
We’d love to hear your thoughts and experiences in the comments section below, and please share any tips or rituals that you find useful in your morning shave.
This article is courtesy of WorthyandSpruce.com. If you enjoyed this article, please feel free to share with your friends and check out their range of classic shaving supplies here.